
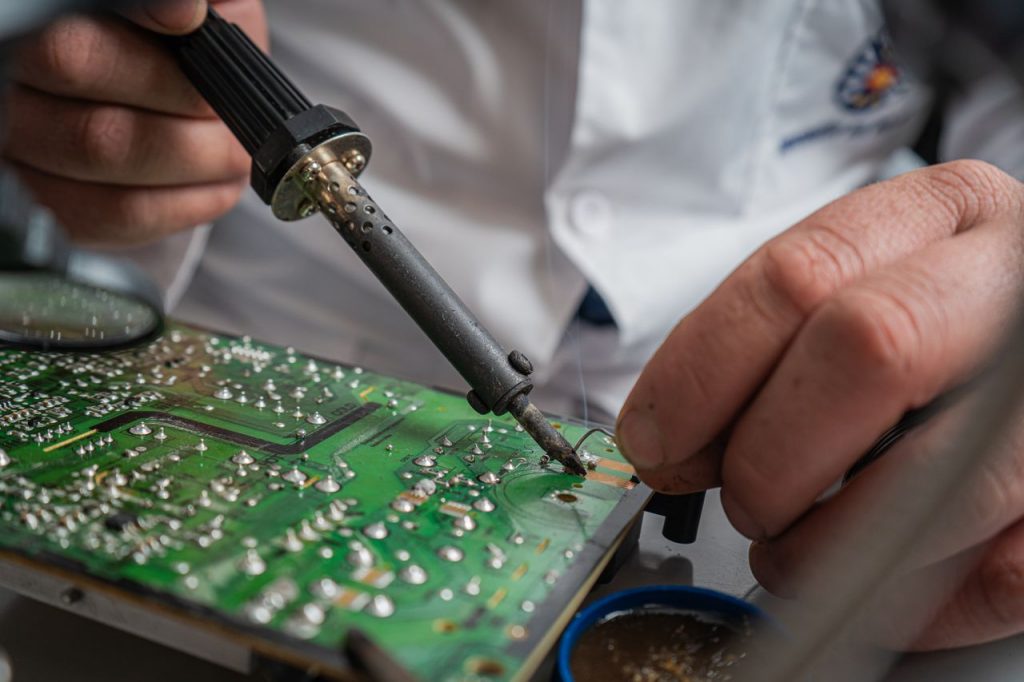
Professional Embedded Debugging: JTAG, OpenOCD and GDB — The Complete Workflow
Debugging embedded systems has long been the poor relation of software engineering practices. In web or application development, graphical debuggers, structured logging and automated tests are part of everyday life. On microcontrollers, many teams still rely on the printf method — and spend entire days guessing why a firmware misbehaves under real-world conditions. This is not inevitable: a complete toolchain, combining a JTAG/SWD probe, OpenOCD and GDB, gives a microcontroller the same level of visibility as a desktop development environment. This article details the full workflow, from hardware selection to hard fault analysis, including integration into a continuous integration pipeline.
Why printf-based debugging hits its limits
The printf reflex — or its equivalents UART_LOG, ESP_LOGx, Serial.print() — works as long as the bug lives in pure application logic. But it fails in four situations typical of industrial embedded work:
- Timing problems. Adding a printf changes execution times, shifts interrupts and can make the bug disappear — or appear. The debugger alters the observed behaviour, the classic “works in debug, crashes in release” scenario.
- Hard faults and other exceptions. When the core jumps to the exception vector, printf stops executing. You need to inspect registers, the stack and the PC to understand what happened.
- Optimisation-related bugs. A compiler with
-O2reorders, removes and transforms code. Variables inspected through printf may be optimised away, and behaviour can differ from the unoptimised build. - Resource consumption. Text output consumes flash (printf formatting can represent several kB), CPU cycles, UART bandwidth and energy — a deal-breaker on battery-powered IoT nodes.
Hardware-probe debugging answers all of these: it adds no code to the firmware, does not alter timing (except at breakpoints), and gives access to the complete processor state, including during an exception.
JTAG and SWD: understanding the two debug interfaces
Before choosing a probe, you need to understand the two protocols it speaks. They are not equivalent alternatives: they answer different constraints.
JTAG — IEEE 1149.1, the historical standard
JTAG (Joint Test Action Group) is standardised under IEEE 1149.1. Originally designed for board testing via boundary scan — the ability to drive every pin of a chip from the test chain — it became the de facto standard for processor debug access. On the pin side, four signals are mandatory: TCK (clock), TMS (state selector), TDI (data in), TDO (data out), often joined by TRST (TAP controller reset). Communication relies on a state machine (the TAP, Test Access Port) driven by TMS and TCK, giving access to a chain of internal registers.
JTAG’s major advantage is its genericity: it works on ARM, RISC-V, embedded x86, FPGAs and most architectures. It also allows daisy-chaining multiple devices on the same interface, useful for programming several components on one board. Its drawback is the pin count and the maximum speed, often limited by board topology.
SWD — Serial Wire Debug, the ARM alternative
Developed by ARM for its Cortex cores, SWD (Serial Wire Debug) reduces the interface to two signals: SWDIO (bidirectional data) and SWCLK (clock). At comparable performance, it frees up space on boards where every pin counts, and it has become the default interface on nearly all ARM Cortex-M microcontrollers. All modern tools — ST-Link, J-Link, CMSIS-DAP, DAPLink — support it natively.
The practical choice is simple: on an ARM Cortex-M core, use SWD. JTAG remains relevant for non-ARM architectures (RISC-V, FPGAs), for production boundary scan, or when the factory test equipment imposes JTAG.
Choosing your debug probe
The probe bridges the host (PC, CI server) and the target. Its choice depends on the microcontroller family, the budget and the speed requirements.
- ST-Link/V2 and V3: the probe shipped with STM32 boards. Excellent for the ST ecosystem, SWD and JTAG support (depending on version), bandwidth sufficient for 99% of use cases. The V3 goes up to a few tens of MHz and adds UART/VCP channels.
- SEGGER J-Link: the reference in speed and features (RTT, accelerated flash download, multi-architecture ARM support, RISC-V on recent models). The EDU model (~€20) is enough for prototyping; commercial versions pay off through programming speed in production.
- CMSIS-DAP / DAPLink: the open interface defined by ARM, implemented on boards costing a few euros (Nucleo, Raspberry Pi Pico in debug mode, KL27Z, etc.). Perfect for low-cost debugging and large-scale CI deployment.
- ESP-Prog and ESP32 probes: for the Espressif ecosystem, the official ESP-Prog probe exposes JTAG, UART and programming; the ESP32-S3 and C3 modules embed a USB-Serial-JTAG controller directly on the chip — a simple USB cable is enough to debug.
- FTDI/FT2232H probes: generic adapters based on the FT2232H (including the famous €15 “JTAG” boards) are OpenOCD-compatible and cover exotic architectures.
For a team designing industrial IoT products, the pragmatic rule: one probe per engineer for development (J-Link or ST-Link depending on architecture), and €10 CMSIS-DAP probes for automated test benches, where bandwidth matters little and unit cost a lot.
OpenOCD: the universal software bridge
OpenOCD (Open On-Chip Debugger) is the open-source software that makes the probe and the target talk to each other. It supports dozens of probes and hundreds of targets, exposes a GDB server (port 3333 by default), a Telnet server (4444) and a Tcl server (6666). It is the central tool of any non-proprietary debug chain.
A typical launch for an STM32 target with an ST-Link probe:
openocd -f interface/stlink.cfg -f target/stm32f4x.cfgFor an ESP32-S3 with the built-in USB-Serial-JTAG probe:
openocd -f interface/esp_usb_jtag.cfg -f target/esp32s3.cfgConfiguration files are the key element: interface/*.cfg describes the probe (pins, speed, protocol), target/*.cfg describes the processor (architecture, registers, memory, flash programming algorithms). OpenOCD natively supports most microcontrollers on the market; for recent chips you sometimes need to write or adapt a target file — a well-documented operation in the project wiki.
The essential commands to know:
reset halt— resets the target and freezes it immediately, the base state for any debug session.flash write_image erase— programs flash with prior erase.program firmware.elf— shortcut that programs and verifies, very handy in CI.mdw / mww— word-by-word memory read/write.reg— displays the registers of the current core.halt / resume— freezes and resumes execution.
GDB in remote mode: full debugging
Once OpenOCD is running, GDB connects to it as to a remote target:
arm-none-eabi-gdb firmware.elf
(gdb) target remote :3333
(gdb) monitor reset halt
(gdb) load
(gdb) continue
The OpenOCD + GDB pair gives access to everything you expect from a debugger: breakpoints, step-by-step execution, variable and memory inspection, backtraces. Two points deserve special attention in embedded work.
Hardware and software breakpoints
On a Cortex-M, GDB uses hardware breakpoints by default when code runs from flash, because it cannot insert a break instruction (BKPT) there. The number of hardware breakpoints is limited — typically 4 to 8 depending on the core (FPB, Flash Patch and Breakpoint unit) — and must be managed: beyond that, GDB falls back to software breakpoints if the region is in RAM, or fails. Conditional breakpoints, very useful, also consume resources: the condition is evaluated by GDB, which slows execution considerably. An effective trick: set a breakpoint on a heavily-trafficked line, then refine with a hardware condition (hwbreak) or by inspecting variables on each hit.
Watchpoints: watching a variable
A watchpoint interrupts the processor when a memory address is read or written. It is the king tool for tracking down memory corruption: a variable changing value without explanation, a buffer overflow overwriting a neighbouring structure. On ARM, watchpoints are hardware (DWT) and limited to 2 to 4 depending on the core — use them sparingly. The command is simple:
(gdb) watch suspicious_variable
(gdb) watch *(uint32_t*)0x20000100
When the watchpoint fires, the backtrace immediately shows which code wrote to that address. This is the fastest debugging that exists for memory corruption.
Inspecting memory and peripherals
Beyond C variables, GDB lets you inspect memory and peripheral registers directly:
(gdb) x/16wx 0x20000000      # 16 words in hexadecimal
(gdb) x/8bx 0x40021000       # peripheral registers
(gdb) p/x *(uint32_t*)0x40021000
This capability turns GDB into a true software oscilloscope: you can check the state of a peripheral register, the alignment of a DMA buffer, or the exact contents of a queue before it is consumed.
Debugging FreeRTOS: seeing tasks, not just the CPU
A FreeRTOS firmware is not debugged like a linear program: the code running at the breakpoint is only one task among many, and the global system state lives in the task list, queues and semaphores. Bare GDB shows the current thread; you need help to see the rest.
OpenOCD has native FreeRTOS support: as soon as it detects the pxCurrentTCB symbol (or the equivalent depending on the version), it exposes each task as a GDB thread. The info threads command then lists all tasks with their state, and thread N switches to a specific task to inspect its stack. This is the difference between “the system is stuck” and “the sensor task is waiting on a semaphore that the network task never releases”.
Two systematic checks when behaviour is erratic:
- The stack high-water mark. The
uxTaskGetStackHighWaterMark()function returns the minimum free space ever observed on a task’s stack. A task stack overflow is one of the most common causes of random hard faults in production — and it is invisible without this measurement. - The overflow detection hook. With
configCHECK_FOR_STACK_OVERFLOWenabled (value 1 or 2),vApplicationStackOverflowHook()fires on overflow. In debug, this hook can simply freeze the system (__asm volatile("bkpt 0")) to analyse the stack with GDB.
Analysing a hard fault: the method that saves days
The hard fault is the most dreaded event: the processor jumps into the handler and the program seems dead. Without a probe, all that remains is manual decoding of the fault registers — tedious work. With GDB, the procedure is almost immediate:
monitor reset halt— bring the target to a known state.- Set a breakpoint on the
HardFault_Handler(or set$pc = HardFault_Handlerandcontinue). - When it fires, examine the fault registers: on Cortex-M,
SCB->CFSR(0xE000ED28) indicates the precise cause — division by zero, unaligned memory access, execution of an illegal instruction, bus fault… - Read
SCB->BFAR(0xE000ED38) for the faulting address in case of a bus or memory fault, andSCB->MMFAR(0xE000ED34) for memory protection faults. - Unwind the saved registers (R0-R3, R12, LR, PC, xPSR are pushed onto the stack by the hardware) to recover the PC of the faulting instruction and the return LR — then run
btfor the full backtrace.
In practice, 80% of hard faults are solved by looking at CFSR plus the faulting PC: it is either an access through a NULL or invalid pointer, a stack overflow, or an access to an unclocked peripheral. All three are visible in one minute with a probe, versus hours of guesswork with printf.
Semihosting, ITM and RTT: debug output without UART
When you need logs but want neither to consume a UART nor modify the firmware, three hardware mechanisms come to the rescue.
Semihosting: the target code calls a host function (printf, fopen…) via a special instruction (BKPT or SVC). The probe intercepts the call and handles it on the host. Zero pins consumed, but execution stops at every call — unusable in production, perfect in development.
ITM/SWO (Instrumentation Trace Macrocell): on Cortex-M, the ITM port sends trace data out on the SWO pin (a single pin) at high rates, without stopping the processor. By redirecting printf (or better, ITM_SendChar) to the ITM port, you get real-time logs with minimal overhead. This is the elegant solution for logging under real timing conditions.
SEGGER RTT (Real-Time Transfer): a small shared memory region between target and host, read by the probe without stopping the processor. Very fast (the MCU writes to RAM, the probe reads), no dedicated pin, supported by OpenOCD and J-Link. It has become the preferred method for teams wanting high-frequency logs — up to several MB/s in practice on J-Link.
In an industrial IoT project, the recommended pattern: RTT or ITM for development logs, a service UART for production logs (on-site diagnostics), and never a blocking printf inside ISRs.
Integrating debugging into the CI pipeline
The probe is not only for interactive debugging: it turns firmware validation into an automated, reproducible process. OpenOCD in batch mode, driven from a script, can:
- Program the target after every build:
openocd -f interface/... -f target/... -c "program build/firmware.elf verify reset exit". - Run hardware tests: launch the firmware, wait for an RTT pattern or a memory value, verify that a GPIO reaches the expected state, then produce a test report.
- Capture coredumps: when a test fails, freeze the target and extract the complete state (registers, stack, memory) for offline analysis — the same information as an application crash dump.
- Measure metrics: boot time, per-task CPU usage (via the DWT cycle counter), latency between an interrupt and its handling — objective data to validate real-time requirements.
GDB in batch mode (gdb -batch -ex "target remote :3333" -ex "..." firmware.elf) automates checks: read a variable, compare to an expected value, exit with an error code the CI server can act on. Combined with €10 CMSIS-DAP probes on test benches, this gives a distributed hardware test infrastructure for a fraction of the cost of dedicated test equipment.
Field-tested best practices
A few habits that genuinely change an embedded team’s productivity:
- Always compile with debug info (
-g), even in release: symbols and line info cost nothing in flash if you strip the final ELF (arm-none-eabi-strip) after programming. - Disable optimisation on suspicious areas: compiling a single file at
-O0with__attribute__((optimize("O0")))lets you debug one module without losing the benefits of global optimisation. - Keep an unstripped ELF per build, archived with the version number: it is the only way to analyse a crash of a production-deployed firmware — finding the exact build and loading its ELF in GDB gives the crash backtrace.
- Use assertions and fault hooks: FreeRTOS
configASSERT, stack overflow hooks, and a hard fault handler that freezes the system and writes the state to a persistent memory region. In production, that region can be retrieved over the telemetry channel — a remote mini-coredump. - Document the project’s OpenOCD/GDB commands in a Makefile:
make debug,make flash,make test— so every team member uses exactly the same configuration, and CI does the same. - Check voltage levels: a probe that struggles with 3.3 V or an atypical logic level (1.8 V) produces intermittent errors that look like firmware bugs. The probe voltage choice (
adapter speed, VREF) must be aligned with the target from day one.
Conclusion
Professional embedded debugging is not a luxury reserved for large design offices: a probe costing a few tens of euros, OpenOCD and GDB form a complete toolchain that transforms firmware development. Days lost guessing where a hard fault came from become few-minute analyses; production logs become exploitable coredumps; and hardware validation joins the CI pipeline alongside unit tests. For an industrial SME, this is often the difference between a project slipping by weeks and a controlled time-to-market.
At IOTINNOV, we apply this methodology across all our embedded developments — from telemetry nodes to multi-equipment supervision systems: systematic probe on the bench, tooled hard fault analysis, and automated validation before every delivery. If your team spends too much time chasing intermittent bugs or wants to industrialise its hardware testing, contact us to discuss it.
À lire aussi
- Edge Computing for Industrial IoT: Architecture, Protocols, and Deployment Str
- Generative AI for Industry: Concrete Use Cases, RAG Architecture and Return on
- Industrial IoT Firmware Security: Secure Boot, Flash Encryption, and OTA Updat
- Connected Industrial Asset Management: Manage Your Equipment Fleet in Real Tim
- Predictive Maintenance IoT: Anticipate Breakdowns Before They Stop Your Produc
- IoT Sensor Security: 7 Essential Best Practices
- Industrial IoT Network Security: Technical Guide 2026
- FreeRTOS in Industrial Environments: Architecture, Pitfalls, and Best Practice
- Industrial IoT Traceability: From Raw Material to Finished Product
Un besoin similaire sur votre parc ?
Échangeons 10 minutes — sans engagement
Parlons de votre besoin →